Big thanks to everyone who became Facebook fans of Missile Mouse!
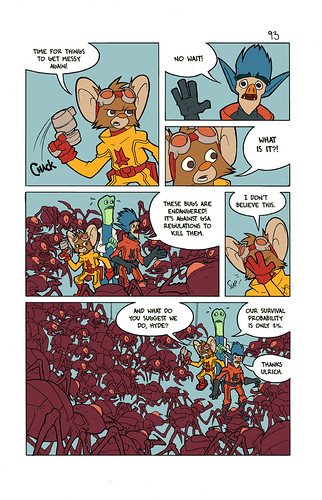
So today I want to share with you the process behind one of the pages from the from The Star Crusher. This was one of my favorite pages to work on in the book, but it was also a beast. As you can see from one of the panels from the page above.
Step 1: the Thumbnail
I couldn't find the thumbnail for this page, but I drew it at about 1 x 2 inches, very loose and simple, almost just stick figures.
Step 2: the Sketch
I draw this at the actual print size which is 9 x 6 inches. I keep it really loose, which helps me to focus on layout, composition, and shape and not get bogged down in details. This gives me a good sense of how it will look when printed.
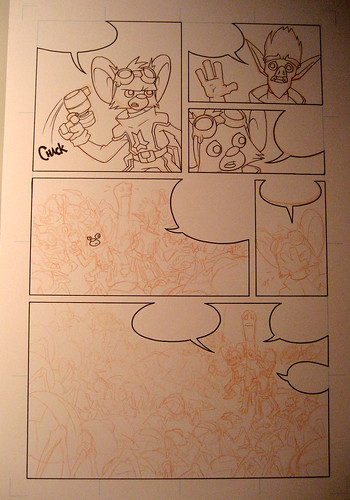
Step 3: the Rough
I don't have a scan of this step, but I took a photo of the page in the middle of inking. I take my sketch page from step 2, scan it, blow it up, and print it on 11x 17 paper and use it as a guide for my roughs via the light box. You can see the roughed-in drawings in the spots not inked yet. I don't labor over the rough too much preferring to reserve some of the exploration of the drawing during inking.
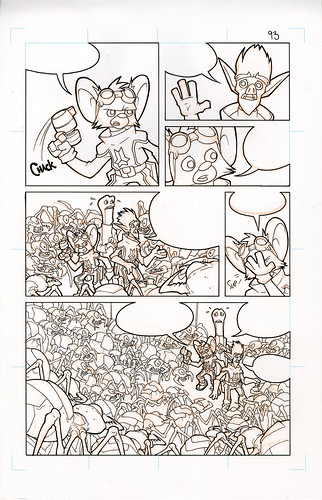
Step 4: the Inks
Here it is fully inked. Microns on heavy stock laser printer paper. I bought a ream of this stuff at my local print shop and made my own guides in Photoshop, then printed them myself on my Epson. The ream cost about 35 dollars for 250 sheets as opposed to comic paper which is a buck a sheet at it's cheapest. I also letter it at this stage using a proprietary font I made from my handwriting.
Step 5: the Flats
Once the page is scanned and imported into Photoshop, I lay in the flat colors by selecting and filling, and/or using the hard round brush. I keep the characters on a separate layer from the background.
Step 6: the Final Color
Here's where I add in all the shadows and highlights and the effects like swoosh-marks, sound effects, and gun flash. And it's done. On to the next page!


1 comment:
I love your process work, it helps me so much, thanks!
Post a Comment