
How to fix an inking mistake with out using Photoshop (aka how comics use to be made).
You guys asked for more how to/process stuff so here you go. While working on Missile Mouse Book 2 on Saturday the perfect opportunity presented itself to make a nice "how to."Ok, this has to have been one of the most hair-pullingly-frustrating pages I've done...ever. Although there are several names I've thought to call this little devil it is simply known in the Parker house as "Page 86." One reason the experience was so frustrating was it should have been a painlessly easy page to draw.
Get in, draw it, get out, on to the next page.
But I ended up spending a whole afternoon on it! Right now I'm averaging about 1.15 hours to ink a page, a little fast for my taste, but the deadline is looming. It is important to note this whole thing could have been avoided if I was working at a more thoughtful leisurely pace. Right now the pace is "highly motivated to meet my deadline." So, I've been using a little more white out than usual.
All right, lets get on to it.
The Set Up:
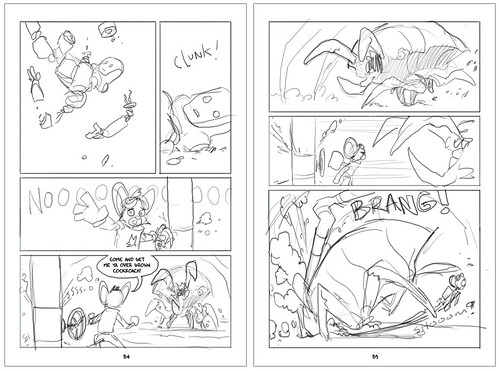
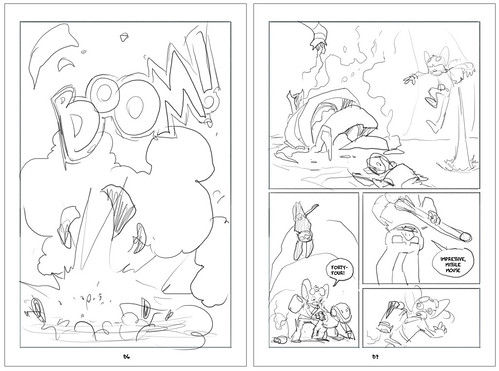
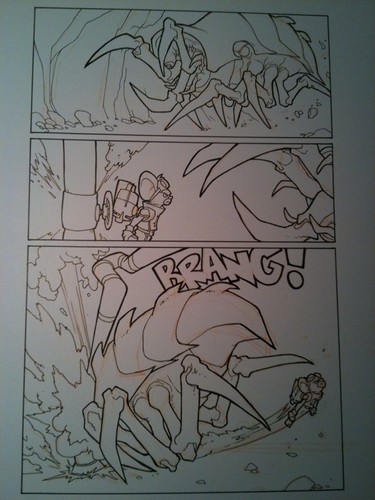
I started with my roughs. After seeing MM's robot partner destroyed by the cave monster he positions himself in front of the large pipe of explosive fuel. The monster charges, MM rockets out of the way and BOOM! the monster is toast.Here's the roughs. Pages 84-87:
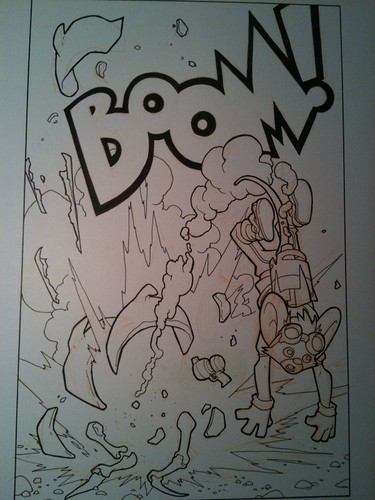
I had a last minute impression to show Missile Mouse in the same shot with the explosion. I thought it might be cool to show him getting thrown off balance by the force of the explosion. So I inked it up, and upon finishing realized the whole sense of scale was off. The explosion looked like happened right under him. That, and MM just looked funny in that pose. Like his head was dislocated.
I hate scrapping a finished page, but I couldn't stand to look at this one. The errors were too glaring. And I wasn't going to let page 86 bring the book down. So I started over.
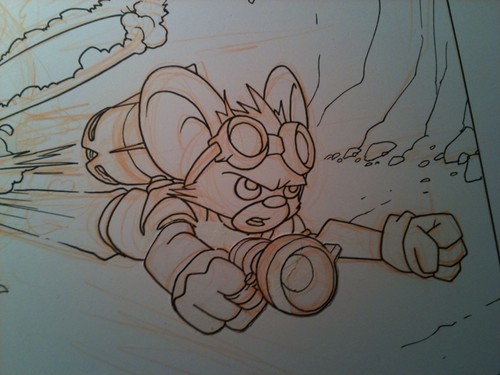
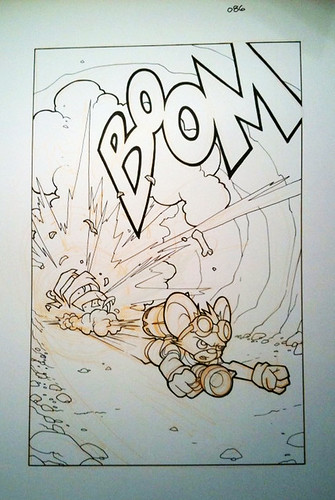
Here's the new page. This time I made a better boom, and made it look like he was rocketing away from the splosion. Canned the idea of him getting thrown off, and kept him in control of the situation. And using perspective (which I learned in the seventh grade, but apparently it fell out of my head while drawing the last page) I made it look like the explosion was far behind him instead of in his lap. Ah, much better. Smooth sailing from here on out, right?
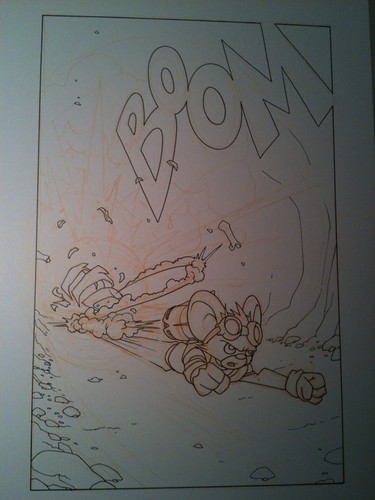
Wrong. You noticed the page isn't finished though. That's because right around now I realized I had forgotten to draw his blaster in his hand. Gah! Closer look:
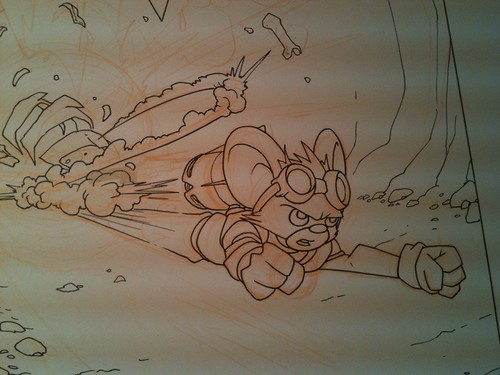
No blaster.
Also, I showed my wife and she asked what was going on with the smoke exhaust from MM's rocket. I said he's winding away from the explosion. She said it looked stupid. Ok. She's right.
At this point I'm contemplating packing up up and going home. But no, I realize if I do that the page wins. I'm going to bring this battle to the page and fight it on his turf.
Side note: Due to space constraints in my home right now, my computer is up on the second floor in my bedroom. My drafting table and art space is down in the dank dusty unfinished basement. Nestled between the water meter and the furnace. I like it this way because the computer can be a huge distraction. And being down there where no kids like to set foot allows me to get into the "zone" easier. It also has motivated me to keep things old school and fix it right on the page instead of saving it for Photoshop. I like doing it this way because at the end of the day I have a finished inked page, and not some random bits of drawings that need to be scanned in and pieced together.
The Process:
Ok, now to the process boys and girls. This is how your grandfather fixed a mistake on a comic page:Step 1: Draw!
Make a new layer...I mean, place a new sheet of paper over your drawing and, using a light box for proper placement and proportion, draw the hand holding the blaster how it should have been drawn in the first place.Step 2: Cut!
Once it's drawn you'll use a thing called an X-Acto knife to cut it out. It's like the lasso tool, but real. (You notice the correction tape on the circle area. I'm even screwing up the drawing I'm fixing my drawing with.)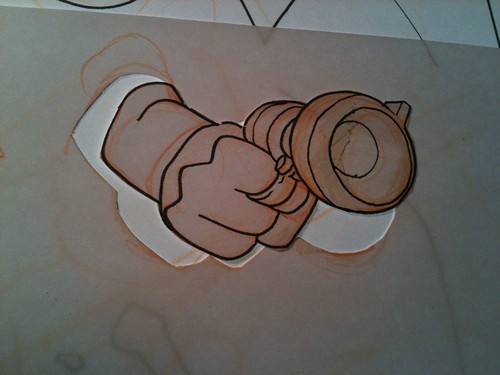
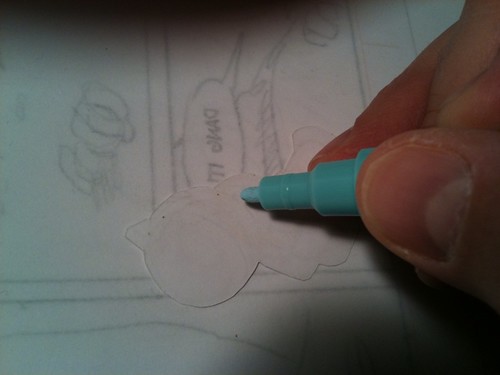
Step 3: Placement!
You'll want to make sure it's going to fit right on the page. At this point mark where you're going to put it so you know what other parts of the drawing to white out.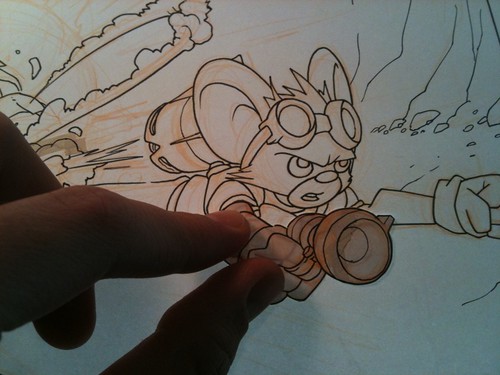
Like this. I use the Tombo correctional tape for all my mistakes. Inking mistakes I mean. Glides on smooth and dry.
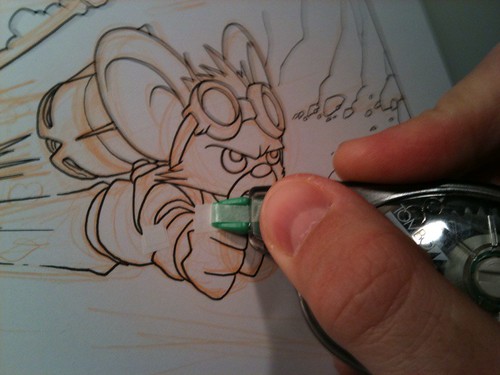
Step 4: Paste!
My wife had the perfect tool for this. The Martha Stewart glue pen. Worked like a charm! Thanks honey.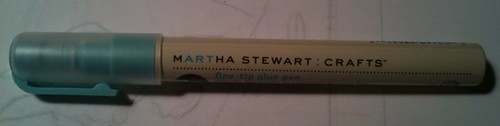
Pasted! But not done yet.
Step 5: Seamlesstify!
Ink around the edges of the paper and over the whited out areas to make the addition fit seamlessly with the rest of the drawing.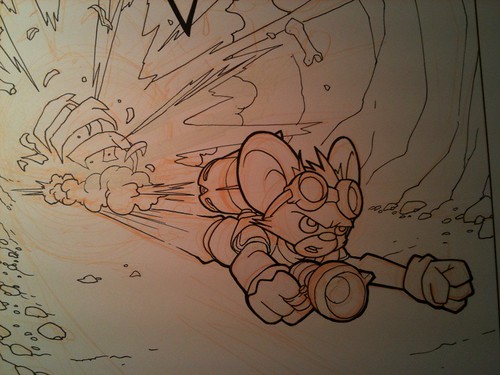
Also took care of the stupid looking smoke trail. Thanks honey!
Ink the rest and stick a fork in it 'cause it's done!
Final note: After looking at it again, and rereading the roughs I think the original rough for 86 is right. I should have just stuck to the original idea to have a huge explosion with no Missile Mouse. I'll come back to it after the whole book is inked and see how it flows with the rest of the book.